 Save to Pinterest
 There’s a particular sizzle in my kitchen every time I’m tasked with baking for a big milestone, but this deep blue and gold graduation cake had an energy all its own. I still hear the celebratory chatter echoing around the counter as I split batter into bowls, mixing in swoops of color, turning the kitchen into an impromptu art studio. The real thrill came when the layers baked—fragrant and fluffy, promising that perfect ombre reveal. There’s just something about adding those golden streaks on chilled buttercream that makes the whole place feel a little more special. This cake doesn’t just mark an achievement: it actually feels like a celebration in every crumb.
One loud afternoon, I remember scraping buttercream with my nephew at my elbow, both of us fighting the urge to swipe a finger through the frosting. We swapped stories about favorite teachers and hardest exams as we stacked blue-on-blue, his sneakers thumping wildly in anticipation of the first slice. Realizing how a cake can turn nervous energy into pure excitement stuck with me. Those brief, messy moments often end up more meaningful than the perfection I chase with my offset spatula.
Ingredients
- All-purpose flour: I use a kitchen scale to get a consistent crumb; fluff, spoon, and level for best results.
- Baking powder & baking soda: Both together keep each layer extra light—don’t skip the sifting step for even rise.
- Salt: Just enough to sharpen the underlying sweetness in every bite.
- Unsalted butter: Make sure it’s fully softened; one forgotten cold cube will leave stubborn lumps.
- Granulated sugar: I beat this patiently for maximum fluff—rushing here dulls the texture.
- Eggs: At room temperature, they blend seamlessly without curdling the batter.
- Pure vanilla extract: Don’t be shy with this—it lifts the flavor above ordinary cake.
- Whole milk: Room temp helps everything come together smoothly and creates a tender crumb.
- Blue gel food coloring (navy, royal, light blue): Gel colors are intensely pigmented; a little goes a long way for those dramatic ombre layers.
- Powdered sugar: I sift it to avoid those little sugar pebbles in my buttercream.
- Milk or cream: Start with a splash—too much and the buttercream slides off the cake.
- Dark blue gel food coloring: To get an inky finish, I tint some buttercream two shades darker than the lightest cake layer.
- Edible gold leaf or edible gold dust: Handle gently with dry tweezers; the gold tears easily but adds pure wow factor.
- Clear alcohol (if using gold dust): Vodka dries quickly and helps the shimmer stick; lemon extract works in a pinch.
Tired of Takeout? 🥡
Get 10 meals you can make faster than delivery arrives. Seriously.
One email. No spam. Unsubscribe anytime.
Instructions
- Prep your pans:
- Grease and line three 8-inch pans—get those corners snug so your cake releases easily.
- Mix dry ingredients:
- Sift together flour, baking powder, baking soda, and salt; there’s a quiet joy in watching those soft heaps form.
- Cream butter and sugar:
- Beat until the mixture is almost white and impossibly fluffy—listen for the gentle tap of the mixer against the bowl.
- Add eggs and vanilla:
- Crack in eggs one by one, letting each disappear before adding the next; drizzle in vanilla for a fragrant lift.
- Alternate dry and wet:
- Add flour and milk in turns, beginning and ending with flour—mix just until smooth and no more.
- Tint to ombre:
- Divide the batter and mix in blue gel food coloring, graduating from light to deep navy. It’s like watching a sky fade into twilight.
- Bake the layers:
- Pour each shade into its pan, smooth the tops, and bake until a toothpick comes out clean—your kitchen should start to smell like sweet anticipation.
- Cool completely:
- Let cakes cool in pans briefly, then carefully turn onto racks. Don’t rush or the layers may crack.
- Make buttercream:
- Whip butter until creamy, then slowly add powdered sugar. Stream in vanilla and a pinch of salt; adjust consistency with milk as needed.
- Color the buttercream:
- Reserve some plain for the crumb coat. Tint the rest with dark blue gel color for a bold, celebratory finish.
- Stack the ombre layers:
- Level cakes if needed, then layer from darkest to lightest, spreading buttercream in between. It feels like assembling an edible trophy.
- Crumb coat and chill:
- Spread a thin layer of reserved buttercream around the cake—don’t worry about perfection. Chill to set for easier final frosting.
- Frost to finish:
- Smooth on blue buttercream, blend in lighter tones if desired, and create those soft ombre transitions.
- Apply the gold:
- Press gold leaf or paint on gold dust with a delicate hand, aiming for artful edges or streaks. It’s a magical touch to crown your creation.
- Chill and serve:
- Let the cake chill until the moment is right to slice, then savor every bite.
 Save to Pinterest
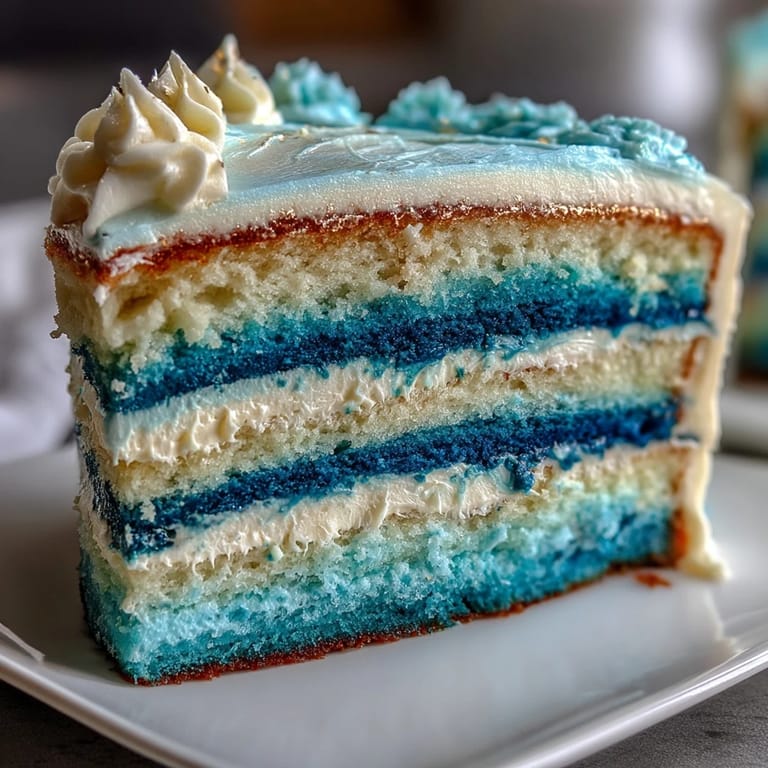
 I’ll never forget the look on my brother’s face when he saw the first slice: wide-eyed, gold dust catching the afternoon sun, Ombre layers glowing as if someone had bottled celebration itself. Sometimes, baking a cake like this turns the table into the heart of the party, leaving everyone just a little more dazzled than before.
Making the Ombre Effect Feel Effortless
Mixing the food color just right can be tricky—start small, add a dot at a time, and swirl until you see a shade that makes you smile. I use the back of a spoon to compare layers beside sunlight before committing to the bake; a little patience here avoids muddying your gradient. And if you’re ever uncertain, remember: once frosted and gilded, every shade finds its place in the spotlight.
Decorating With Gold for Maximum Drama
Handling gold leaf always feels like you’re working with the world’s most delicate treasure. I discovered that a pair of tweezers and a steady exhale helps the gold settle perfectly onto the chilled buttercream. The transformation is instant, with flecks catching light and impressing even the toughest critics in the room.
Serving and Storing Your Masterpiece
There’s real satisfaction in unveiling this cake at the end of a special meal—each slice distinctly blue, every guest a little in awe. I recommend slicing with a hot, dry knife for the cleanest reveals, and storing any leftovers tightly covered in the refrigerator; the flavor actually deepens by day two.
- Bring to room temperature before serving for the softest crumb.
- Gold flecks stay brightest if you add them right before the celebration.
- Snap a photo—the colors and shine don’t last long after the first slice.
 Save to Pinterest
 Whether you’re marking a graduation or simply conquering the ombre layer challenge, this cake is as much about the moment as the flavor. Let every slice remind you how good it feels to celebrate—and to share.
FAQs About This Recipe
- → How do I achieve vivid blue ombre layers?
Divide the batter and gradually add more blue gel food coloring to each bowl, ranging from light to dark for a smooth gradient.
- → What is the best way to apply gold accents?
Use edible gold leaf or brush gold dust mixed with clear alcohol onto the chilled cake for elegant streaks or highlights.
- → Can this be made ahead of time?
Yes, you can bake and frost a day in advance. Chill the assembled cake and apply gold accents before serving for best results.
- → Are there alternatives to buttercream frosting?
Cream cheese or mascarpone frostings work, but ensure they're smooth for a clean ombre effect and able to hold decorations.
- → How do I safely use edible gold decorations?
Always check that the gold leaf or gold dust packaging states "edible" to ensure safe use on desserts.
- → Can this dessert be made in other colors?
Absolutely! Try other ombre color themes to fit any celebration, simply switching out the food coloring shades.