 Save to Pinterest
 There’s something oddly satisfying about the rhythm of piping royal icing on sugar cookies, each gentle squeeze of the bag a small celebration in itself. Last spring, the kitchen was filled with the hum of distant marching band music drifting through the window as I set out to create a batch of diploma and graduation cap cookies. The smell of butter and vanilla hung in the air, punctuated by bursts of laughter as a few shapes got, admittedly, a little squashed. That’s the beauty of these cookies: behind every polished golden tassel is a moment of cheerful chaos. With each batch, I find a new reason to fall in love with the simple act of marking milestones in sugar and gold.
The first time I made these for my cousin’s graduation, I remember icing cookies while nervously watching the clock, hoping each one would dry in time for the big party. My niece, eyes wide with anticipation, perched on a stool and expertly added specks of gold dust to every tassel. That kitchen session became more than just prep—it turned into a quiet, sweet send-off, and those cookies disappeared faster than the cake.
Ingredients
- All-purpose flour: This is what gives structure to the cookies. Chill your dough before rolling so the shapes hold up in the oven.
- Unsalted butter: Always let your butter soften completely for an extra-fluffy, melt-in-your-mouth bite.
- Granulated sugar: Cream it well with the butter for extra lift—the stage for a smooth dough starts here.
- Large egg: An essential binder for cookies that won’t crumble during decorating.
- Pure vanilla extract: I’ve tried skipping it before, but the aroma fills the house with expectation.
- Almond extract (optional): Just a hint gives the cookies an edge—some like to swap in lemon for spring flair.
- Salt: A pinch keeps the sweetness in check and rounds out the flavor.
- Powdered sugar: Smooth royal icing needs well-sifted, clump-free sugar to ensure even coloring.
- Egg whites or meringue powder: This is what makes the royal icing stable enough for precise piping.
- Cream of tartar: Just a dash keeps the icing not-too-stiff and perfectly glossy.
- Black gel food coloring: A little goes a long way—a tiny dab turns bright white icing into a sleek black cap.
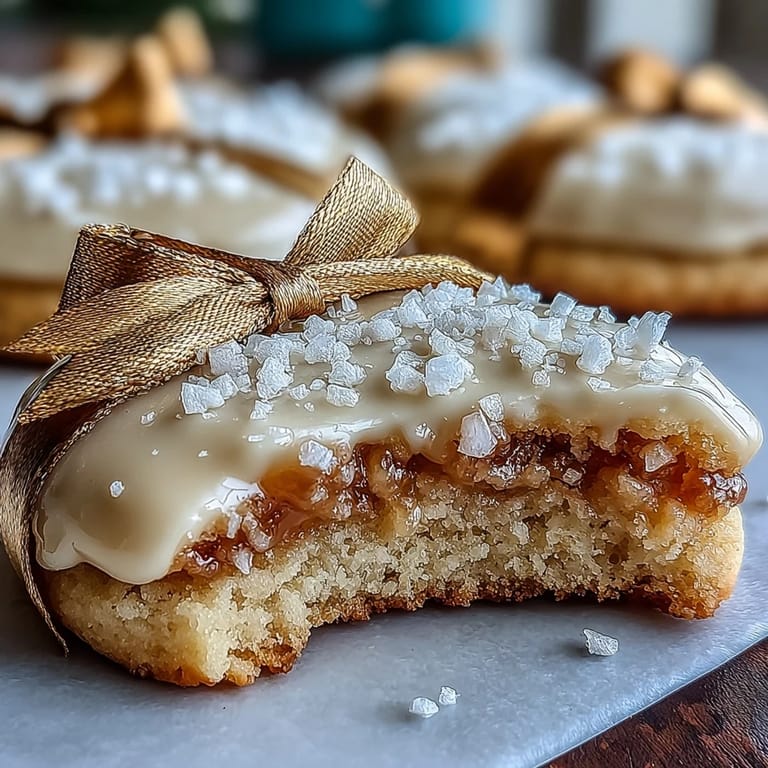
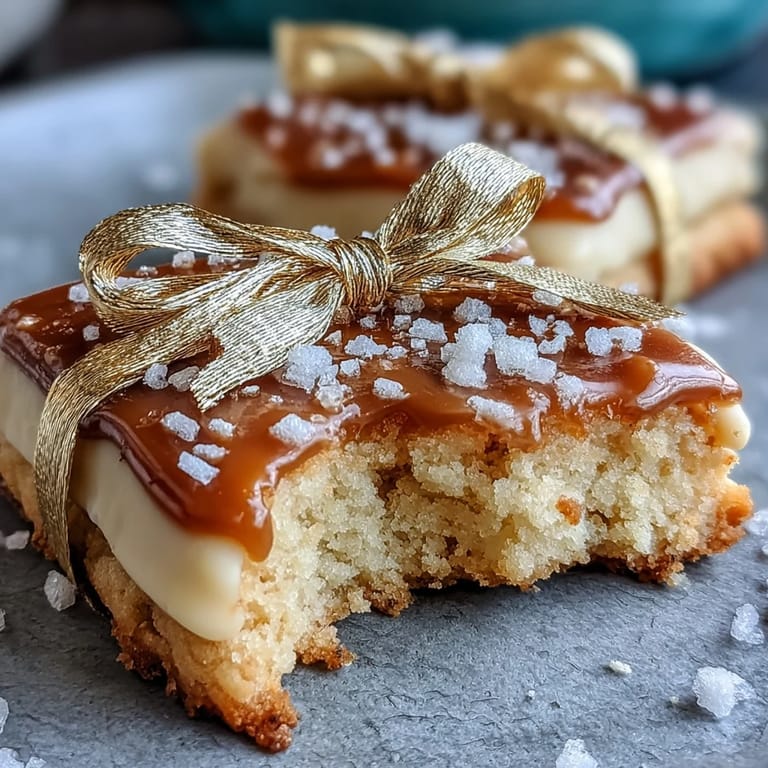
- Gold edible luster dust: The finishing touch for sparkling, celebratory cookies; blend it with clear alcohol or lemon extract for a paintable shine.
Tired of Takeout? 🥡
Get 10 meals you can make faster than delivery arrives. Seriously.
One email. No spam. Unsubscribe anytime.
Instructions
- Cream your base:
- Start by mixing the butter and sugar until it’s almost fluffy enough to eat by itself; egg and extracts go in and make the kitchen smell like a bakery.
- Mix in the dry:
- Tip your flour and salt in gradually, stopping as soon as the dough holds together for cookies that aren’t tough.
- Chill out:
- Split your dough into two, flatten, wrap, and chill it—impatience here leads to sticky cutouts later.
- Prep for baking:
- Line your pans, preheat the oven, and dust your counter with flour before rolling the dough to an even 1/4-inch—no one likes thin, burnt edges.
- Cut and bake:
- Stamp out caps and diplomas, spacing them a little apart, and bake just until edges turn golden—watch closely, as they can go from pale to brown in seconds.
- Cool completely:
- Transfer the cookies to racks, resisting the urge to decorate while they’re warm to avoid melting the icing.
- Whip up royal icing:
- For icing, beat the egg whites till frothy, rain in powdered sugar, add cream of tartar, and mix to firm, shiny peaks before flavoring with vanilla.
- Divide and color:
- Split the icing, dye a bit black, keep some white, and reserve some plain for gold painting—the bowls look like a painter’s studio.
- Get decorating:
- Pipe outlines and flood each shape with color. Let them set for about an hour so details stay sharp and vibrant.
- Add golden details:
- Mix luster dust with clear alcohol or lemon extract and brush on delicate gold accents for a touch of ceremony.
 Save to Pinterest
  Save to Pinterest
 Watching guests compare tassel details, debating which golden ribbon looked the most official, I realized these cookies had become their own tradition at any graduation in my circle. The proud smiles (and sticky fingers) said it all: achievement tastes a little sweeter in gold.
Decorating Graduates: Tips for Cookie Success
Don’t sweat less-than-perfect piping; tiny quirks make each cookie unmistakably homemade. Gather friends or family to help—it’s more fun with shared laughter and a bit of healthy competition for ’best cap.’ Mixing the gold luster just right is surprisingly soothing, and if you get shimmer everywhere, consider yourself officially festive.
Choosing and Storing Edible Gold
The right luster dust really does elevate these cookies—a quick online search reveals vibrant options. Opt for a brand labeled ’edible’ (not just ’non-toxic’), and try a gentle lemon extract when mixing for the brightest shine. Store decorated cookies between layers of parchment in an airtight tin; the gold stays bold for days.
Making Ahead and Customizing Flavors
These cookies hold up brilliantly when made a day or two in advance, letting the icing set and flavors meld even more. If almond isn’t your favorite, lemon or orange extract adds a burst of freshness for spring graduations.
- Luster dust can be brushed onto dried icing only—don’t rush it
- Cookie cutters can be swapped for homemade templates in a pinch
- Chill your royal icing if the kitchen gets too warm—details will hold their edge
 Save to Pinterest
 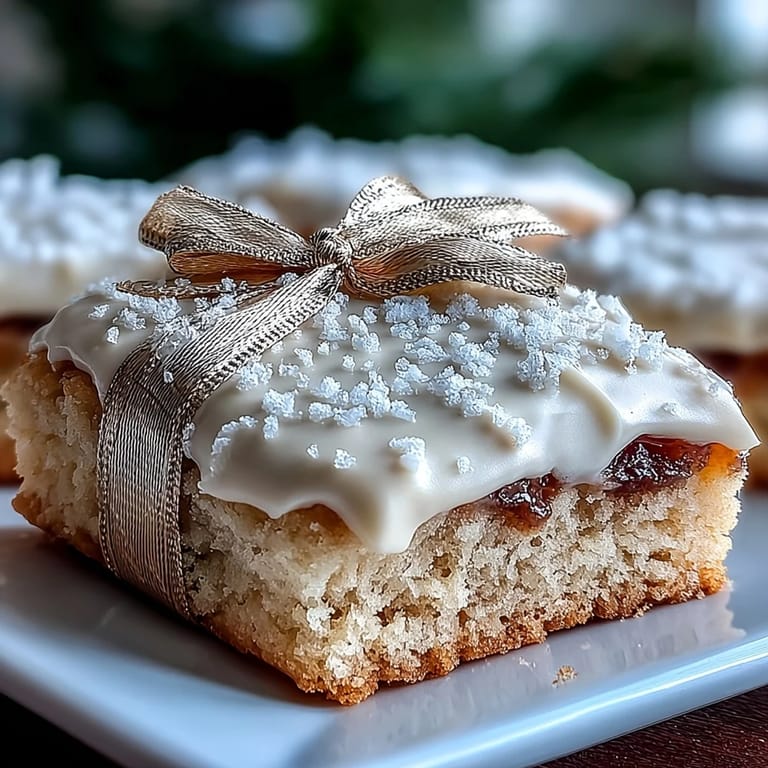 Save to Pinterest
 Whether you’re baking for a crowd or just to celebrate a small victory, each golden accent is a wink to life’s bright moments. Here’s to marking every achievement with a dash of sugar, a brush of gold, and a table full of smiles.
FAQs About This Recipe
- → How do I prevent the cookies from spreading?
Chill the dough for at least 45 minutes before rolling, work on a lightly floured surface, and avoid over-softening the butter. Use parchment-lined sheets and chill cut shapes briefly on the tray if the dough warms while cutting.
- → How can I get smooth, glossy royal icing?
Sift the powdered sugar, then beat egg whites (or meringue powder with water) and cream of tartar until stiff, glossy peaks form. Beat slowly at first, then increase speed to eliminate lumps. Strain if needed and rest briefly to allow bubbles to settle before piping.
- → What's the best way to achieve deep black icing without thinning it?
Use concentrated gel or paste black coloring and add a small amount at a time. Let the tinted icing rest; colors often darken as they sit. If needed, intensify the shade with tiny drops rather than adding liquid that would change consistency.
- → How do I make and apply the gold accents safely?
Mix edible gold luster dust with a few drops of clear alcohol (like vodka) or lemon extract to form a paint. Use a fine, food-safe brush to apply to tassels and ribbons after the icing has set. Allow the painted details to dry completely before packing.
- → Can I prepare these ahead of time and how should I store them?
Yes. Fully cooled, decorated cookies can be stored in an airtight container at room temperature for up to one week. Layer with parchment to protect decorations and ensure icing is fully dry before stacking.
- → Are there suitable ingredient substitutions for allergies?
For egg concerns in royal icing, use meringue powder with water. For dairy-sensitive bakers, try a vegan butter substitute for the cookie dough, but expect small texture changes. Always check decorations for potential cross-contact allergens.