 Save to Pinterest
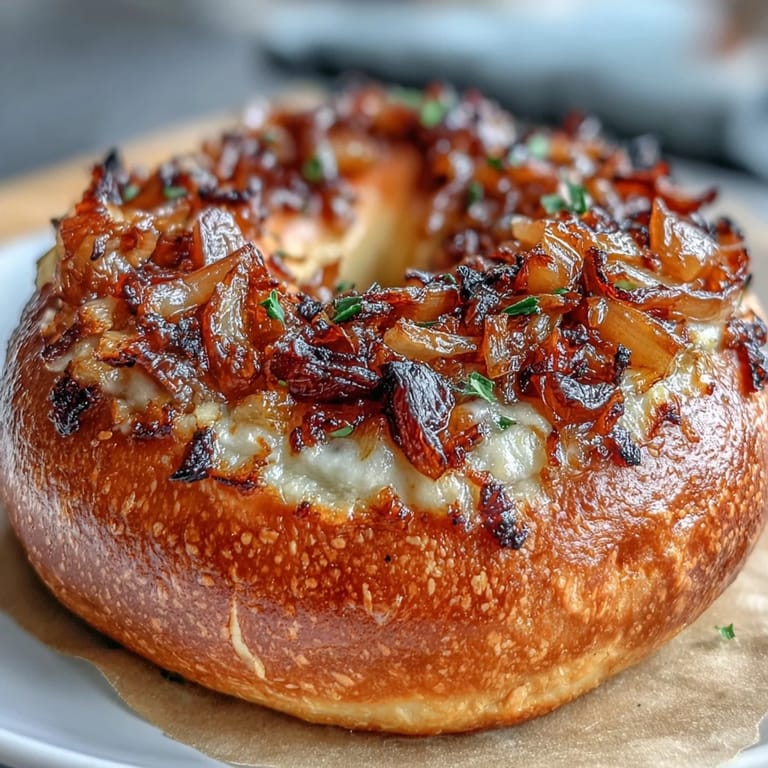
 There's something almost meditative about the moment when you pull a warm bagel from the oven and the steam rises up, carrying that unmistakable tangy-sweet perfume of sourdough and caramelized onions. I discovered these bagels on a foggy Sunday morning when my starter was particularly bubbly and I had half a yellow onion sitting on the counter, looking like it needed a purpose. What started as an experiment—mixing sourdough's subtle funk with the golden sweetness of slowly cooked onions—became the breakfast I now make whenever I want to impress myself.
I remember making a batch for my neighbor who swore she didn't eat carbs, then watching her eat two within the hour while standing in my kitchen. She kept saying she could taste the sourdough's personality in every bite, which made me realize that when you're patient enough to let fermentation do its work, the bagels become less of a breakfast item and more of a small gift you're giving yourself and everyone around you.
Ingredients
- Active sourdough starter (100 g): This is your flavor secret—a healthy, bubbly starter gives you that signature tang without any commercial yeast, and using it at full strength means your bagels develop character overnight.
- Bread flour (400 g): The high protein content creates that chewy, toothsome texture that separates real bagels from just, well, bread with holes in it.
- Whole wheat flour (50 g): A small amount adds nuttiness and helps the dough hold moisture, making your bagels stay fresh longer than you'd expect.
- Sea salt (10 g in dough, 1/2 tsp for onions): Salt strengthens the gluten network and makes every flavor pop, so don't skip it or reduce it.
- Granulated sugar (25 g): Just enough to feed the starter and develop a subtle sweetness that plays beautifully against the onion topping.
- Lukewarm water (240 ml): Temperature matters—too hot kills the starter's living cultures, too cold and your dough stays sluggish and sad.
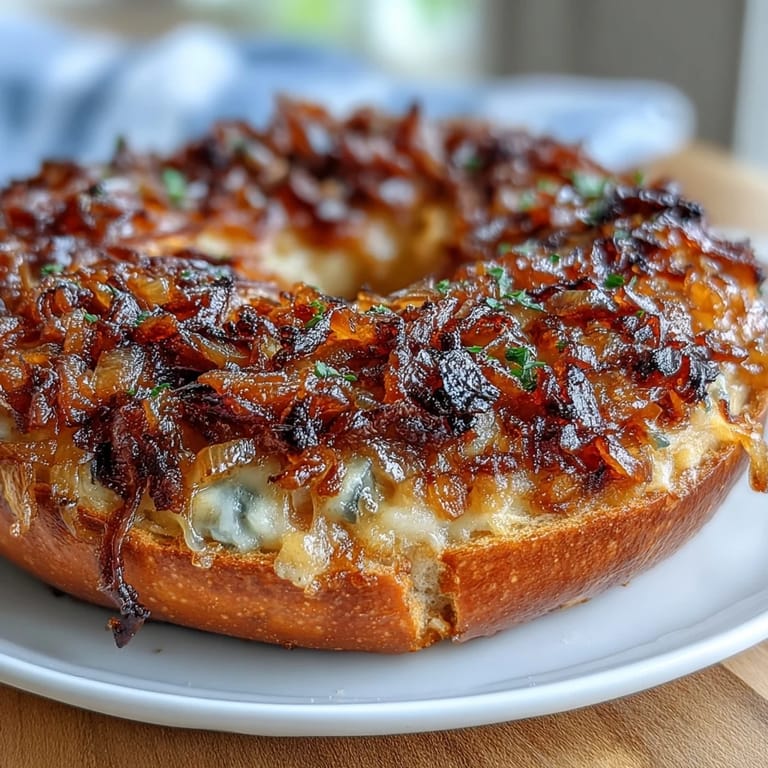
- Yellow onion (1 large): Yellow onions are sweeter than red or white, and when you cook them slowly and patiently, they transform into something almost jam-like and golden.
- Olive oil or unsalted butter (1 tbsp): Either works, but I use butter for a richer, more nostalgic flavor that feels more bagel-shop authentic.
- Barley malt syrup (1 tbsp): This is the pro move—it gives bagels that deep, classic bagel flavor, but honestly, honey works if that's what you have.
- Baking soda (1 tsp): It raises the pH of your boiling water so the bagels develop that characteristic chewy, slightly dark exterior that everyone expects.
Tired of Takeout? 🥡
Get 10 meals you can make faster than delivery arrives. Seriously.
One email. No spam. Unsubscribe anytime.
Instructions
- Caramelize your onions first:
- Heat your oil or butter over medium heat and add the chopped onions with salt, then let them cook for 8–10 minutes, stirring occasionally, until they're soft, sweet, and that gorgeous golden-brown color. The smell alone is worth the wait, and doing this ahead means you're not juggling hot pans while your dough is ready.
- Mix your dough:
- Combine your active starter, both flours, salt, sugar, and water in a large bowl and stir until everything is shaggy and there are no dry flour pockets. You're not going for smooth yet—just making sure everything knows each other.
- Knead with intention:
- Knead for 8–10 minutes by hand (or 6–8 minutes in a stand mixer) until the dough becomes smooth, elastic, and slightly springy. You'll feel the transformation under your hands—it's genuinely satisfying.
- Rest and develop:
- Cover your bowl and let the dough sit at room temperature for 4 hours, doing two stretch-and-fold motions during the first 2 hours (every 30 minutes), which builds strength without aggressive kneading. Each fold takes 30 seconds and makes a real difference in how the dough develops.
- Cold ferment overnight:
- Cover and refrigerate for 8–12 hours—this is where the sourdough magic happens, and your dough develops that complex, slightly tangy flavor that rushed bagels just don't have. The cold slows everything down, which means the flavors have time to get interesting.
- Shape your bagels:
- Divide the dough into 8 equal pieces, roll each into a ball, then poke a hole in the center and gently stretch it into a bagel shape with about a 2-inch diameter hole (the hole closes slightly when it proofs and boils, so go a bit bigger than you think). Shape all 8 before moving forward—it's easier to keep momentum than to interrupt yourself.
- Proof until puffy:
- Place shaped bagels on parchment paper, cover loosely, and let them rise for 1–2 hours at room temperature until they're slightly puffy and pillowy but still hold their shape when you gently poke them. You want them proofed enough to be light, but not so much that they deflate or lose their structure.
- Boil with precision:
- Preheat your oven to 220°C (425°F) and bring water, barley malt syrup, and baking soda to a rolling boil—the baking soda is essential, so don't skip it. Boil bagels 1–2 at a time, 1 minute per side, then remove them with a slotted spoon and return them to your parchment-lined sheet.
- Top and bake:
- While the bagels are still damp from boiling, press your cooled sautéed onions generously onto the top of each one—they'll stick better to the moisture. Bake for 20–25 minutes until the bagels are deep golden brown and sound hollow when you tap them.
- Cool completely:
- Transfer to a wire rack and let them cool for at least 15 minutes before you slice into them, which lets the crumb set and makes slicing cleaner and less steamy.
 Save to Pinterest
 There was an afternoon when my kid asked if bagels were supposed to be this chewy, and when I cut one open to show the perfect internal crumb structure and hear that satisfying crack, I realized that good fermentation isn't just about following a recipe—it's about respecting time and trusting that living dough knows what it's doing. That's the moment these stopped being breakfast and became proof that slowing down actually makes everything taste better.
The Sourdough Advantage
Using sourdough starter instead of commercial yeast means your bagels develop a subtle tanginess that balances the sweet caramelized onions perfectly, plus the fermentation process creates better digestibility and a crumb structure that stays fresh longer. The flavor compounds that develop during the cold overnight fermentation are something no amount of yeast rushing can replicate—your dough is literally alive and changing the whole time it sits in your fridge.
Why Boiling Matters
The boiling step is what separates bagels from pretenders masquerading as bagels, because the brief bath in water with baking soda sets the exterior and creates that signature chewy, slightly dark crust that's impossible to achieve through baking alone. The starch on the surface gelatinizes during boiling, creating a seal that traps steam, which is why your bagels end up with that tender-outside, chewy-inside contrast that makes you want to make them again immediately.
Making Them Your Own
Once you've made these once, you'll start seeing all the ways you can personalize them, whether that's adding seeds to the onion topping, experimenting with different onion varieties, or even trying caramelized garlic if you're feeling adventurous. The base recipe is forgiving enough that it can handle your creativity while staying true to what makes a bagel a bagel.
- Poppy seeds or sesame seeds press beautifully into the damp onions and add a toasted flavor that elevates the whole bagel.
- If you're making these for a crowd, you can shape and freeze them unbaked, then boil straight from frozen with just a minute extra per side.
- Store cooled bagels in an airtight container for 3–4 days, or slice and freeze for up to a month—toasted from frozen, they taste almost as good as fresh.
 Save to Pinterest
 These bagels taught me that breakfast doesn't have to be rushed, and that taking time to ferment, caramelize, and boil is actually the point—not an obstacle. Every bite tastes like patience paid off.
FAQs About This Recipe
- → What gives the bagels their chewy texture?
The combination of bread and whole wheat flours with the sourdough starter, along with kneading and fermentation, develops gluten that creates a chewy bite.
- → Why are the bagels boiled before baking?
Boiling the bagels briefly gelatinizes the surface starches, forming a shiny crust and helping the bagels maintain their dense, chewy texture during baking.
- → How does the overnight fermentation affect flavor?
Extended fermentation allows natural sourdough cultures to develop, enhancing both tanginess and depth of flavor in the dough.
- → What is the purpose of sautéing the onions first?
Sautéing softens the onions and brings out their natural sweetness, preventing raw sharpness while adding a golden caramelized layer on top.
- → Can other toppings be added with the onions?
Yes, options like poppy seeds or sesame seeds can be added alongside the sautéed onions for extra texture and flavor.
- → What role does barley malt syrup or honey play in boiling water?
These sweeteners enhance browning and contribute to the signature bagel flavor during the boiling process.