Save to Pinterest
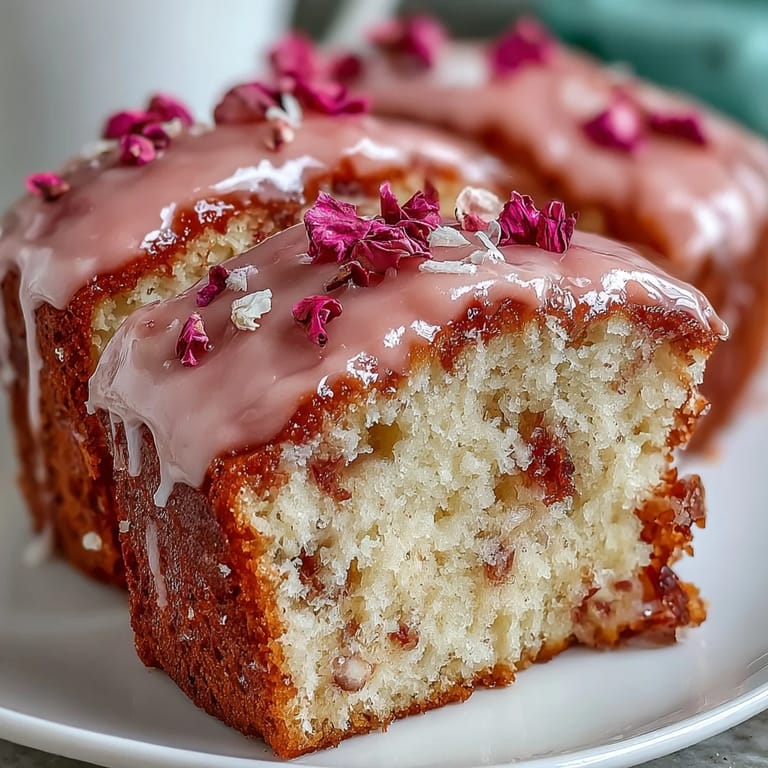
 My sister called me three weeks before Mother's Day in a panic—she'd volunteered to bring dessert to our family gathering and suddenly realized she had no idea what to make. I found her standing in the kitchen holding a printout of five different cake recipes, overwhelmed by choice. That's when I decided to walk her through making this pink ombre cake, and watching her face light up as those buttercream layers came together was worth every minute of hands-on coaching. Now it's become the cake we make together every spring, a tradition that tastes like teamwork and celebration.
I'll never forget the first time my mother saw this cake finished—she actually teared up because someone had made something that beautiful just for her. It wasn't fancy restaurant cooking; it was butter, sugar, and intention arranged in shades of pink. That moment taught me that presentation matters less than the love baked into it, but when you can do both, magic happens.
Ingredients
- All-purpose flour (2 ½ cups): The foundation of a tender crumb—make sure it's fresh and lump-free when you measure, or sift it first.
- Baking powder (2 ½ tsp): This is your lift; don't skip it or reduce it just because you're worried about density.
- Salt (½ tsp): A pinch that rounds out the sweetness and deepens the vanilla flavor in ways you won't consciously notice but will absolutely taste.
- Unsalted butter (1 cup for sponge, 1 ½ cups for frosting): Room temperature is non-negotiable—cold butter won't cream properly and you'll end up with a dense cake instead of a cloud.
- Granulated sugar (2 cups): Creaming this with butter for several minutes traps air bubbles that create that ethereal crumb texture.
- Large eggs (4): Room temperature so they blend seamlessly into the batter without causing lumps or curdling.
- Pure vanilla extract (1 tbsp for sponge, 2 tsp for frosting): Pure extract (not imitation) makes a noticeable difference in the final flavor profile.
- Whole milk (1 cup): Warmed slightly or at room temperature—this helps emulsify the batter and creates moisture.
- Powdered sugar (5 cups, sifted): Sifting removes lumps that would otherwise create grainy frosting, and trust me, you'll taste the difference.
- Milk or heavy cream (2-3 tbsp): Heavy cream makes the frosting silkier, but milk works just fine if that's what you have.
- Gel food coloring (pink): Gel holds its color intensity without adding moisture like liquid coloring does, which would thin out your buttercream.
- Edible flowers: Violets, pansies, or rose petals that look delicate but actually taste like nothing, so they're really there for the artistry.
Tired of Takeout? 🥡
Get 10 meals you can make faster than delivery arrives. Seriously.
One email. No spam. Unsubscribe anytime.
Instructions
- Set the stage:
- Preheat your oven to 350°F and grease those three cake pans—and I mean really grease them, then line with parchment paper cut to fit the bottoms. Trust me on this; you don't want to fish cake pieces out of stubborn pans.
- Build your dry foundation:
- Whisk the flour, baking powder, and salt together in a medium bowl until they're evenly combined. This distributes the leavening agent so your cake rises evenly instead of puffing up in one corner.
- Cream the butter and sugar:
- In a large bowl, beat the butter and sugar together for 3 to 4 minutes on high speed until it looks pale, fluffy, and almost like frosting itself. This is where the magic starts—you're basically making tiny air pockets that will make your cake tender.
- Add the eggs one by one:
- Beat in each egg individually, mixing well after each addition so the batter stays emulsified. If you dump all four in at once, you risk curdling the mixture, which sounds dramatic but will give you a tougher crumb.
- Mix in the vanilla:
- Stir in the vanilla extract and let it distribute fully through the butter mixture before moving to the next step.
- Alternate the dry and wet:
- Add the flour mixture and milk in three parts each, always starting and ending with flour—this prevents the batter from becoming too thin and keeps everything well-incorporated. Mix just until combined; overmixing at this stage develops gluten and toughens the cake.
- Divide into pans:
- Split the batter evenly among the three prepared pans—use a kitchen scale if you want absolutely even layers, or just eyeball it carefully.
- Bake with confidence:
- Bake for 25 to 30 minutes until a toothpick inserted into the center comes out clean with maybe just a crumb or two clinging to it. The cake will smell heavenly and pull slightly away from the sides of the pan.
- Cool with patience:
- Let the cakes sit in their pans for 10 minutes (this helps them set without breaking apart), then turn them out onto wire racks to cool completely. Trying to frost warm cake is a recipe for melted frosting disaster.
- Make the buttercream magic:
- Beat the room-temperature butter on high speed for 2 to 3 minutes until it's creamy and pale, then gradually add the sifted powdered sugar on low speed so you don't get a cloud of sugar everywhere. Once the sugar is incorporated, add the vanilla and milk, then beat on high for another 3 minutes until the frosting is fluffy and light.
- Create the ombre effect:
- Divide the buttercream into four bowls—one stays white as your base, and the other three get increasing amounts of pink gel coloring to create a gradient from pale blush to deeper rose. Use a toothpick to add coloring a tiny bit at a time; you can always add more but you can't take it out.
- Stack and frost:
- Place the first cake layer on your serving plate, spread the darkest pink buttercream on top, then stack the second layer and spread medium pink buttercream, then top with the final layer and cover the top with light pink buttercream. Use the white buttercream for the sides, creating a subtle contrast that makes the ombre pop.
- Smooth and blend:
- Use an offset spatula to smooth the frosting into a clean finish, and if you're feeling fancy, use a bench scraper held at an angle against the sides to blend the ombre shades upward in a gradient. This step takes a few minutes but transforms the cake from homemade to looking like it came from a professional.
- Decorate with flowers:
- Scatter your edible flowers across the top and sides while the frosting is still slightly soft so they stick gently. If you're using non-edible flower toppers just for looks, remember to remove them before slicing and serving.
- Chill before serving:
- Pop the finished cake into the refrigerator for at least 30 minutes before slicing—this firms up the frosting and gives you much cleaner, more impressive cuts.
 Save to Pinterest
 There's something about making this cake that transforms a kitchen into a space where everyone wants to gather and help. My nephew once asked if we could make the frosting darker pink because he wanted it to look like a sunset, and we spent 20 minutes adjusting colors together until it was exactly right—that's when I realized this cake had become less about the recipe and more about the people making it.
Timing and Prep Strategy
The beauty of this cake is that you can make the layers the day before and store them in an airtight container, then do all the frosting and decorating the morning of your gathering. This takes the pressure off trying to do everything at once and ensures your flowers stay fresh and vibrant. I've found that baking in the evening, letting everything cool overnight, and assembling the next morning gives me the calmest, most confident baking experience.
Troubleshooting Your Layers
If your cake layers come out slightly domed instead of flat, don't panic—just trim the tops with a serrated knife to level them before frosting. Some ovens run hot, so if your cakes are browning too quickly, tent them loosely with foil partway through baking. And if a layer cracks when you're turning it out of the pan, that's not a failure; just use it as your middle layer and nobody will ever know once it's frosted.
Flavor Variations and Add-Ons
This vanilla base is incredibly versatile—I've experimented with everything from almond extract to lemon zest, and they all work beautifully. A light brush of simple syrup on the cooled layers adds moisture and subtle sweetness without changing the character of the cake. If you want to make this more decadent, you could add a thin layer of homemade strawberry jam between the cake layers, or swap the vanilla for a subtle rose extract in both the cake and frosting.
- Try adding a tablespoon of lemon zest to the batter for brightness without changing the pink ombre aesthetic.
- A tiny drop of rose extract in the buttercream creates a subtle floral note that feels fancy without being overwhelming.
- Fresh whipped cream piped between the layers adds luxury and helps the cake feel lighter if you're serving it warm.
 Save to Pinterest
 This cake has become my answer to the question of what to make when you want to impress someone—it's showy enough to feel special but approachable enough that even nervous home bakers can pull it off. Every time I make it, I think of my sister standing in the kitchen that spring day, and how teaching someone to bake something beautiful turned out to be a better gift than the cake itself.
FAQs About This Recipe
- → How do I achieve the pink ombre effect in the buttercream?
Divide the buttercream into several portions and tint each with increasing amounts of pink coloring. Layer them from darkest to lightest to create a gradient effect.
- → What type of flowers are safe to use for decoration?
Use edible flowers such as violets, pansies, or rose petals. Remove any non-edible toppers before serving.
- → Can I make the vanilla sponge ahead of time?
Yes, bake and cool the layers fully, then wrap them tightly and store in the refrigerator until ready to assemble.
- → How can I ensure smooth buttercream application?
Use an offset spatula and a bench scraper to spread and blend the buttercream smoothly. Chilling the cake between steps helps maintain clean edges.
- → Is there a way to enhance the vanilla flavor in the sponge?
Brushing the cooled layers with simple syrup can add moisture and deepen vanilla notes.
- → What tools are essential for preparing this cake?
You'll need round cake pans, an electric mixer, mixing bowls, an offset spatula, parchment paper, and optionally a bench scraper.