 Save to Pinterest
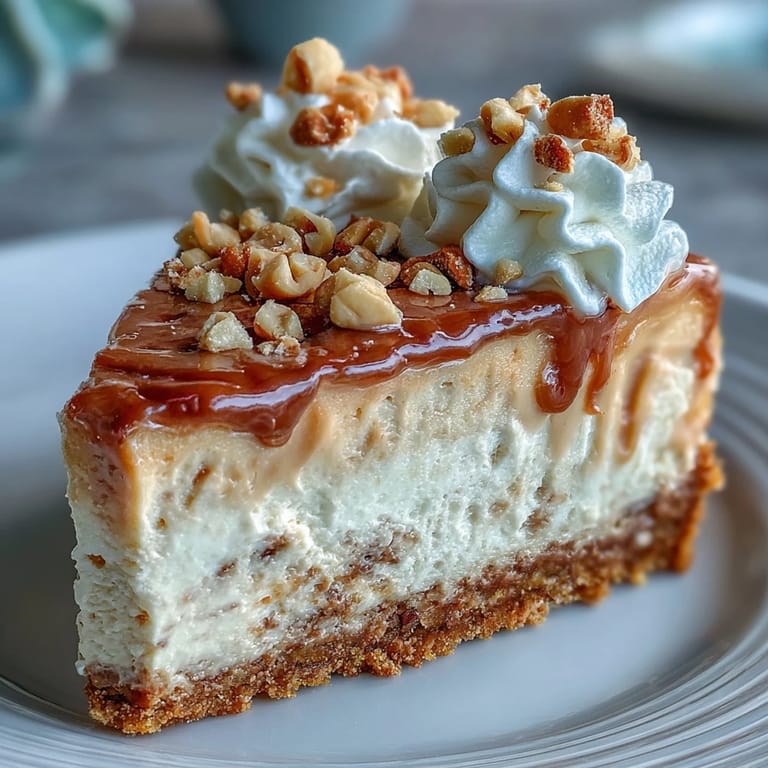
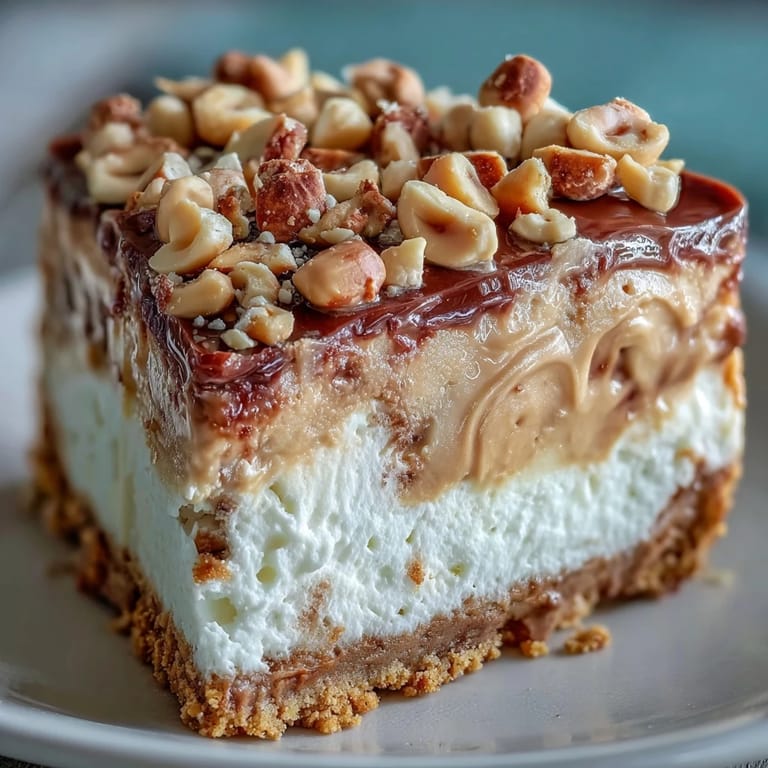
 My sister showed up with a sleeve of Nutter Butters one Saturday and said we should bake something ridiculous. We didn't have a plan, just cream cheese in the fridge and a wild idea that peanut butter belongs in everything. By the time we pulled this cheesecake out of the oven, the kitchen smelled like a childhood lunchbox dream. That wobbly center made us nervous, but after a night in the fridge, it set into something so creamy we fought over the last slice.
I made this for a friend's birthday once, and she cried a little when she saw it because Nutter Butters were her dad's favorite. We sat on her porch in the summer heat, forks in hand, eating straight from the pan. The whipped cream started to melt, and we didn't care. Sometimes a dessert becomes a memory you didn't know you were making.
Ingredients
- Nutter Butter cookies: The foundation of this whole thing, they bring both crunch and nostalgia, and crushing them by hand in a bag is oddly satisfying.
- Unsalted butter: Melted and mixed with the cookies, it binds the crust without making it greasy, and using unsalted lets you control the salt level.
- Cream cheese: Must be soft or it will clump, so leave it out for an hour before you start, trust me on this.
- Granulated sugar: Sweetens the filling just enough to balance the tang of the cream cheese and the richness of peanut butter.
- Vanilla extract: A little goes a long way here, adding warmth without competing with the peanut flavor.
- Eggs: They give structure and that signature cheesecake creaminess, but add them gently or you will bake in air bubbles.
- Creamy peanut butter: Not the natural kind, you want the stuff that stays smooth and doesn't separate, it swirls like a dream.
- Heavy whipping cream: Whips up into clouds that sit perfectly on top and cut through the richness of each bite.
- Powdered sugar: Sweetens the whipped cream without any graininess, and it helps stabilize the peaks.
- Chopped peanuts: Optional but recommended, they add a salty crunch that makes every forkful more interesting.
Tired of Takeout? 🥡
Get 10 meals you can make faster than delivery arrives. Seriously.
One email. No spam. Unsubscribe anytime.
Instructions
- Prep the pan:
- Preheat your oven to 325°F and grease a 9 inch springform pan, then line the bottom with parchment so nothing sticks. This step saves you so much heartache later.
- Make the crust:
- Crush the Nutter Butters until they look like wet sand, then mix in melted butter until everything clumps together. Press it firmly into the pan and bake for 10 minutes to set it, then let it cool completely.
- Beat the base:
- Whip the softened cream cheese and sugar together until it is silky and smooth, about 2 to 3 minutes. Scrape down the sides so no lumps hide.
- Add peanut butter:
- Mix in vanilla and peanut butter until the whole bowl turns golden and smells like heaven. Do not rush this part.
- Fold in eggs:
- Add eggs one at a time on low speed, just until each one disappears into the batter. Overmixing here invites cracks.
- Pour and smooth:
- Pour the filling over the cooled crust and use a spatula to level the top. Tap the pan gently on the counter to release any trapped air.
- Bake low and slow:
- Bake for 50 to 60 minutes until the edges are firm but the center still has a little jiggle, like barely set Jello. It will firm up as it cools.
- Cool in the oven:
- Turn off the heat, crack the oven door, and let the cheesecake sit for an hour. This gradual cooldown is the secret to avoiding those heartbreaking cracks.
- Chill completely:
- Refrigerate for at least 4 hours, but overnight is even better. The flavors deepen and the texture becomes impossibly creamy.
- Whip the topping:
- Beat heavy cream with powdered sugar until stiff peaks form, then spread it over the chilled cheesecake. It should look like soft drifts of snow.
- Garnish and serve:
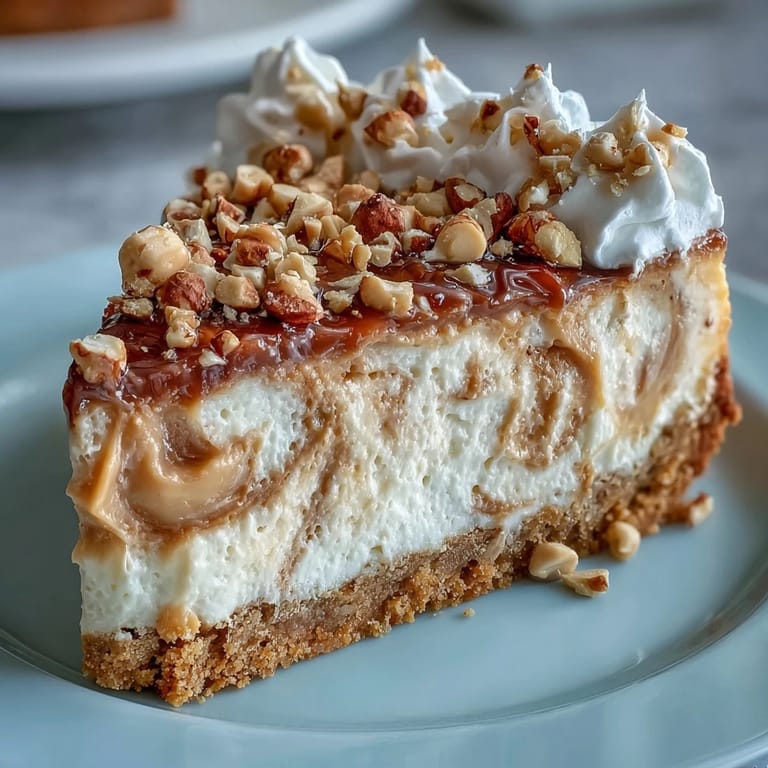
- Sprinkle chopped peanuts and tuck in extra Nutter Butters around the edge if you are feeling fancy. Slice with a hot, clean knife for perfect edges.
 Save to Pinterest
 The first time I served this at a potluck, someone asked if I bought it from a bakery. I almost said yes just to avoid the inevitable recipe requests, but then I remembered how good it felt to pull it off. Now I make it whenever I want to feel like I know what I am doing in the kitchen, even when everything else is a mess.
How to Avoid Cracks
Cracks happen when cheesecake cools too fast or bakes too hot, so the slow oven cooldown is not optional. If you want extra insurance, bake it in a water bath by wrapping the pan in foil and setting it in a roasting pan filled with an inch of hot water. The steam keeps the top from drying out and the temperature steady. I have done it both ways, and honestly, a few cracks never hurt anyone, especially once you pile on the whipped cream.
Make Ahead Magic
This cheesecake actually improves after a day in the fridge because the flavors marry and the texture gets even silkier. I bake it the night before any gathering and add the whipped cream right before serving so it stays fluffy. You can even freeze it without the topping for up to a month, then thaw it overnight in the fridge. It comes back to life like nothing ever happened.
Serving Suggestions
This dessert is rich, so thin slices go a long way, and a little goes beautifully with hot coffee or cold milk. Some people drizzle chocolate or caramel sauce over each slice, and I will not stop you. I have also seen it served with fresh strawberries, which sounds weird but the tartness cuts the richness in a way that makes you reach for seconds.
- Serve it straight from the fridge for the cleanest slices and creamiest texture.
- Run your knife under hot water and wipe it clean between cuts for bakery perfect edges.
- Leftover slices keep for up to five days covered in the fridge, though they rarely last that long.
 Save to Pinterest
 This is the kind of dessert that makes people lean back in their chairs and go quiet for a minute. It is sweet, salty, creamy, crunchy, and somehow exactly what you did not know you needed.
FAQs About This Recipe
- → Can I use natural peanut butter instead of creamy?
Creamy commercial peanut butter works best as it provides consistent texture. Natural peanut butter with oil separation may affect the filling's consistency and stability.
- → Why did my cheesecake crack?
Cracks typically occur from over-mixing the eggs, rapid temperature changes, or over-baking. Using a water bath and cooling gradually in the oven with the door cracked helps prevent cracking.
- → How long should I refrigerate before serving?
Refrigerate for at least 4 hours, though overnight chilling produces the best texture and flavor development. The cheesecake needs this time to fully set and become easier to slice cleanly.
- → Can I make this without a springform pan?
While a springform pan makes removal easiest, you can use a regular 9-inch cake pan lined with parchment paper hanging over the sides for lifting handles. Serve directly from the pan if needed.
- → What's the purpose of cooling in the oven with the door open?
This gradual cooling method prevents sudden temperature shock that causes cracks. The residual heat allows the cheesecake to set slowly as it cools, resulting in a smooth, crack-free surface.
- → Can I freeze leftover cheesecake?
Yes, freeze individual slices or the whole cheesecake (without whipped topping) wrapped tightly in plastic and foil for up to 3 months. Thaw overnight in the refrigerator before serving and add fresh whipped cream.