Save to Pinterest
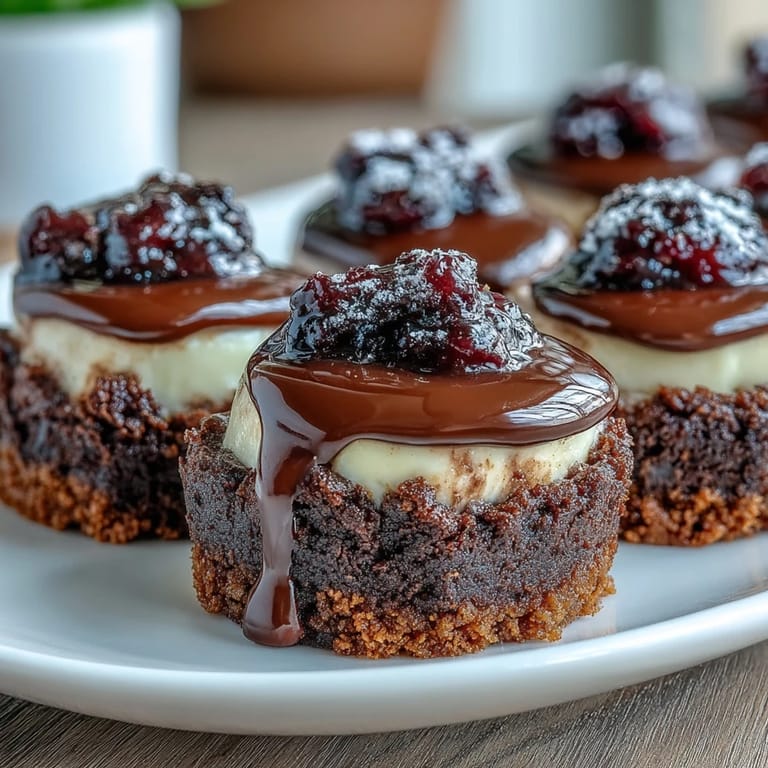
 My neighbor knocked on my door with a housewarming invitation, and I immediately panicked—what do you bring to celebrate someone's new kitchen without showing up empty-handed? That's when I decided to create an entire dessert bar, three different mini treats that could live side by side on a platter and let everyone graze without commitment. The brownies would be fudgy and dark, the lemon cheesecakes bright and tangy, and the fruit tartlets would taste like summer no matter the season. It felt ambitious, but standing in my own kitchen arranging them hours later, I realized this was exactly the kind of gift that says: I spent time thinking about making you happy.
I brought this dessert bar to that housewarming, and what struck me most wasn't compliments—it was watching people stand around the platter, genuinely deliberating which bite to try first. Someone's kid went straight for the brownies, a friend who usually skipped dessert asked for a second lemon cheesecake, and another guest took photos of the tartlets arranged with fresh mint. For the first time, I understood that a dessert bar isn't really about the food—it's about giving people permission to enjoy dessert their own way.
Ingredients
- Unsalted butter: Use real butter, not margarine, especially when melting it with chocolate—the difference in flavor is worth it.
- Dark chocolate, chopped: Quality matters here since it's the star of the brownies; grab something you'd actually eat on its own.
- Granulated sugar: This is what you've got in the pantry, and it's perfect for both the brownie batter and the cheesecake filling.
- Large eggs: Room temperature eggs mix more smoothly, so pull them out thirty minutes before you start cooking.
- Vanilla extract: A teaspoon goes a long way in binding flavors together, especially in the cheesecake.
- All-purpose flour: Don't overwork it once you fold it in, or your brownies will turn tough and dense instead of fudgy.
- Cream cheese, softened: Cold cream cheese will fight you; let it sit on the counter while you prepare everything else.
- Lemon juice and zest: Fresh lemon is non-negotiable here—bottled juice tastes flat and bitter by comparison.
- Digestive biscuits or graham crackers, crushed: These form the crust and need to be crushed fine enough to pack together but still feel a little textured.
- Shortcrust pastry, ready-rolled: Saves time and honestly tastes just as good as homemade; thaw it gently if frozen.
- Whole milk: This becomes your pastry cream, and full-fat milk creates a richer, silkier texture than skim.
- Cornstarch: This is what thickens your pastry cream without making it taste starchy if you do it right.
- Assorted fresh berries: Pick whatever looks brightest at the market; color variety makes the platter genuinely beautiful.
Tired of Takeout? 🥡
Get 10 meals you can make faster than delivery arrives. Seriously.
One email. No spam. Unsubscribe anytime.
Instructions
- Get your workspace ready:
- Preheat your oven to 180°C (350°F) and grease or line your mini muffin tins—this takes two minutes but saves you from sticky situations later. Having everything prepared before you start means you can move smoothly from one component to the next without scrambling.
- Make the brownie batter:
- Melt your butter and chocolate together over a gentle heat until completely smooth, then whisk in sugar, eggs, and vanilla until the mixture looks shiny and thick. Fold in the flour and salt gently—you're not making a cake, you're making something that should stay dense and fudgy.
- Bake the brownies:
- Spoon the batter into 8 mini muffin cups and bake for 12 to 15 minutes until the edges are set but the center still jiggles slightly when you tap the tin. They'll firm up as they cool, so resist the urge to leave them in longer or they'll be dry.
- Prepare the cheesecake base:
- While the brownies bake, mix your crushed biscuits with melted butter until it looks like wet sand, then press the mixture firmly into the bottom of 8 more mini muffin cups. Don't rush this—a well-packed base keeps your cheesecake from sliding around when you cut into it.
- Make the cheesecake filling:
- Beat your softened cream cheese and sugar until completely smooth, then add the egg, lemon juice, zest, and vanilla all at once and mix just until combined. Overmixing introduces air bubbles that can make the filling crack or not set evenly.
- Bake the cheesecakes:
- Spoon the filling over the crusts and bake for 12 to 15 minutes until the edges are just set but the very center still has a tiny wobble. Let them cool completely in the tin, then refrigerate for at least an hour—the cold setting is what gives them that creamy texture.
- Prepare the tartlet shells:
- Cut your shortcrust pastry into 8 circles, press them into mini tartlet tins, and prick the bottoms with a fork to prevent them from puffing up. Bake for 10 to 12 minutes until golden and crisp.
- Make the pastry cream:
- Whisk together milk, egg yolk, sugar, cornstarch, and vanilla in a small saucepan, then place over medium heat and stir constantly until it thickens and coats the back of a spoon. The cornstarch needs heat to do its job, so don't rush this step or your cream will be runny.
- Fill and top the tartlets:
- Once the pastry cream has cooled slightly, spoon it into your tartlet shells, then arrange your fresh berries on top in whatever pattern makes you happy. Do this close to serving so the berries stay bright and the cream stays cool.
- Arrange your dessert bar:
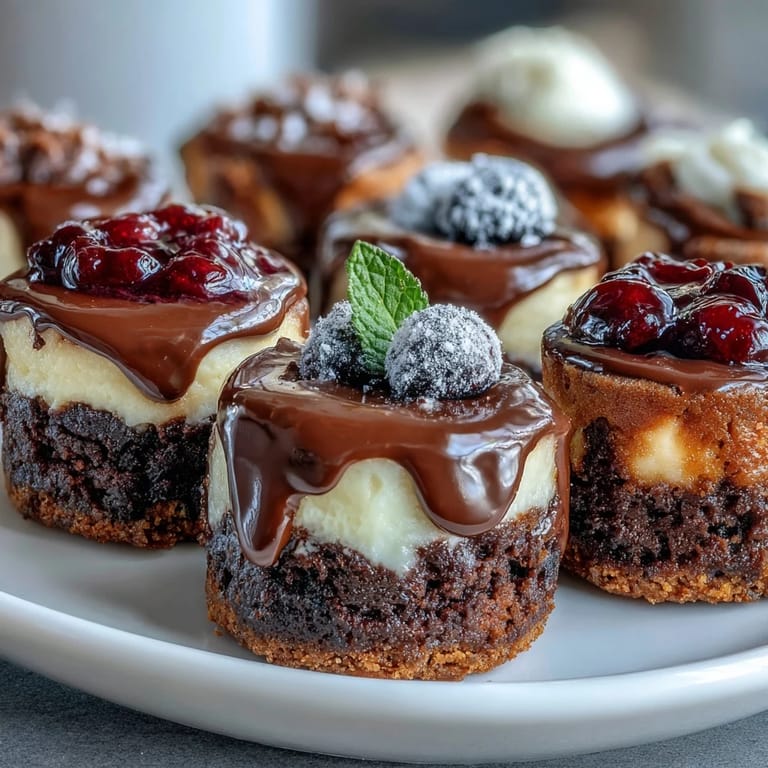
- Arrange all three varieties on a platter or tiered stand, leaving a little space between each treat so people can reach them easily. A few fresh mint leaves scattered around add color and a hint of freshness that balances all the sweetness.
 Save to Pinterest
 Standing in my neighbor's kitchen after she'd settled into her new place, I watched her serve these little treats to visitors over the next few weeks. She told me she kept them in the fridge and offered them with coffee, and somehow they became part of the ritual of showing people around her new home. That's when I realized a dessert bar is really an act of generosity—it's giving someone the gift of time and the freedom to enjoy sweetness on their own terms.
Why This Works as a Dessert Bar
The genius of serving three mini treats on one platter is that you're giving people variety without overwhelming anyone or yourself. Each component brings something different—the brownie is rich and indulgent, the cheesecake is creamy and bright, and the tartlet is light and fresh. When you arrange them together, they make each other taste better by comparison, and guests can mix and match according to their mood or how full they are.
Making This Your Own
The beauty of a mini treat bar is that it's endlessly adaptable—you can swap seasonal fruit into the tartlets, dust the brownies with sea salt or drizzle them with white chocolate, or add a thin layer of lemon curd under the cheesecake filling. I've made versions with coconut in the brownie batter, added a hint of earl grey to the pastry cream, or topped the cheesecakes with a tiny dollop of blueberry compote. The base recipe is forgiving enough to handle experimentation while still tasting polished and intentional.
Serving and Storage Tips
These treats are actually perfect for making ahead—the brownies keep for three days at room temperature in an airtight container, the cheesecakes taste better after a night in the fridge, and the tartlets are best filled and topped on the day you're serving them. If you're taking them somewhere, transport them in a shallow box layered with parchment paper, and arrange them on your serving platter right before guests arrive so everything looks fresh and intentional.
- Chill everything until just before serving so the cheesecakes stay creamy and the pastry cream doesn't melt off the tartlets.
- Garnish with fresh mint or a light dusting of cocoa powder right before people start eating for maximum visual impact.
- Pair with champagne, dessert wine, or even strong coffee to balance the sweetness and make the experience feel truly special.
 Save to Pinterest
 There's something deeply satisfying about offering people choices instead of a single heavy dessert, and this bar delivers exactly that. Every time you make it, you're saying: I know you, and I want you to enjoy this moment exactly as you like it.
FAQs About This Recipe
- → What ingredients enhance the mini brownie bites?
Rich dark chocolate combined with butter and vanilla creates fudgy brownie bites with a smooth texture.
- → How to achieve a creamy texture in the lemon cheesecake cups?
Using softened cream cheese mixed with fresh lemon juice and zest yields a smooth, tangy filling.
- → What is the best method to prepare fruit tartlets?
Pre-baking shortcrust pastry shells, then filling with a thickened milk-egg custard and topping with fresh berries ensures a crisp and refreshing tart.
- → Can the assortment be customized with seasonal ingredients?
Yes, mix and match fillings and toppings using seasonal fruits or drizzles like melted chocolate for variety.
- → What tools are essential for making these mini treats?
Mini muffin tins, tartlet tins, mixing bowls, a whisk, and a saucepan are recommended to prepare and bake these bites efficiently.
- → How long is the total preparation and baking time?
The full process requires approximately 1 hour and 25 minutes, including preparation and baking stages.